Project Swashbuckler
There are motorcycles and then there are motorcycles – and then there’s the GS.
Over the years our teams have ridden and used many a motorcycle but when it was time to choose our first ever ‘project motorcycle’ for Image Drivers ( India ), …it had to be the BMW R1250GS.
Watch the Project Teaser!
(scroll down for full film)
We pulled out all the stops when it came to Nipun Srivastava’s beloved new steed. We called in trained technicians from multiple mechanical disciplines to lend a hand with our build. This build was to be an intense one as the challenge before us was not just to outfit the motorcycle from start to finish, within 24 hours, we were to do it with an entire camera crew from @thenirvanateam pointing their lenses at the motorcycle and all the parts we had got for it!
It had to be the GS.
Everything had to happen like clockwork and right from the start, it didn’t. Early, on the morning of the BMW build, we got to the workshop at 5am, hoping to start by 6 but guess what, the shutters to the shop had jammed shut and refused to open. It took us the better part of an hour to figure out how to jimmy open the damn thing. We got it done, eventually.
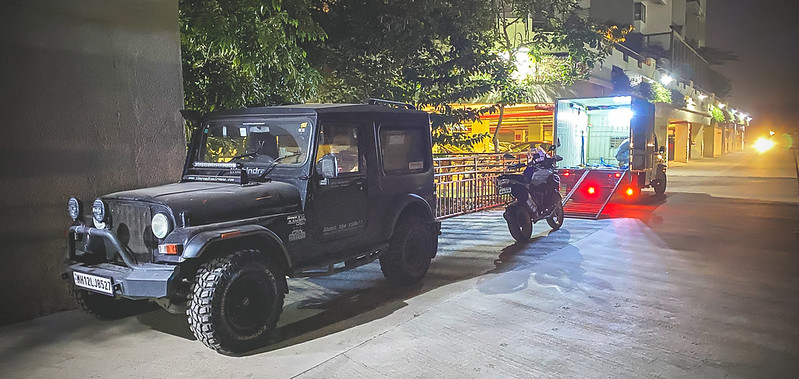
Getting ready to load up!
Inside our workshop for the day, the boys from thenirvanateam got to doing what they do best, setting up all the motorcycle, camera and tooling gear required for the marathon assembly and video shoot which was about to start.
Here’s a list of stuff that we planned to get on the bike that day:
- Lower Crash Guards
- Sump Guard/Bash Plate
- Front axle Slider
- Side Stand Foot Enlarger
- Windscreen Reinforcement
- Brake cylinder Guard, Rear
- Rear brake Reservoir Guard
- EVO Tank Ring
- Daypack Tank Bag
- Gear Shift Lever
- Denali Light Mount
- Denali D4 V2 TriOptic – Wiring and Install
- Upper Crash Bars
- Rear Slider For Drive Shaft
- Aero ABS Pannier System
- Adventure Rack for Top Case
- Adapter Plate for Top Case
- Urban ABS Top Case
Each of these parts was handpicked by Nipun and provided by SW-Motech, Denali Electronics and the heros behind making our vision for the GS possible, the folks at BIG BAD BIKES India!
We caught the bull by its horns and started off with mounting the biggies – the lower crash bars and sump guard from SW-Motech. Then came the quickies – the front axel slider, quick lock tank ring and the side stand enlarger, then came the trickies – the windscreen reinforcements and wire routing for the LEDs.


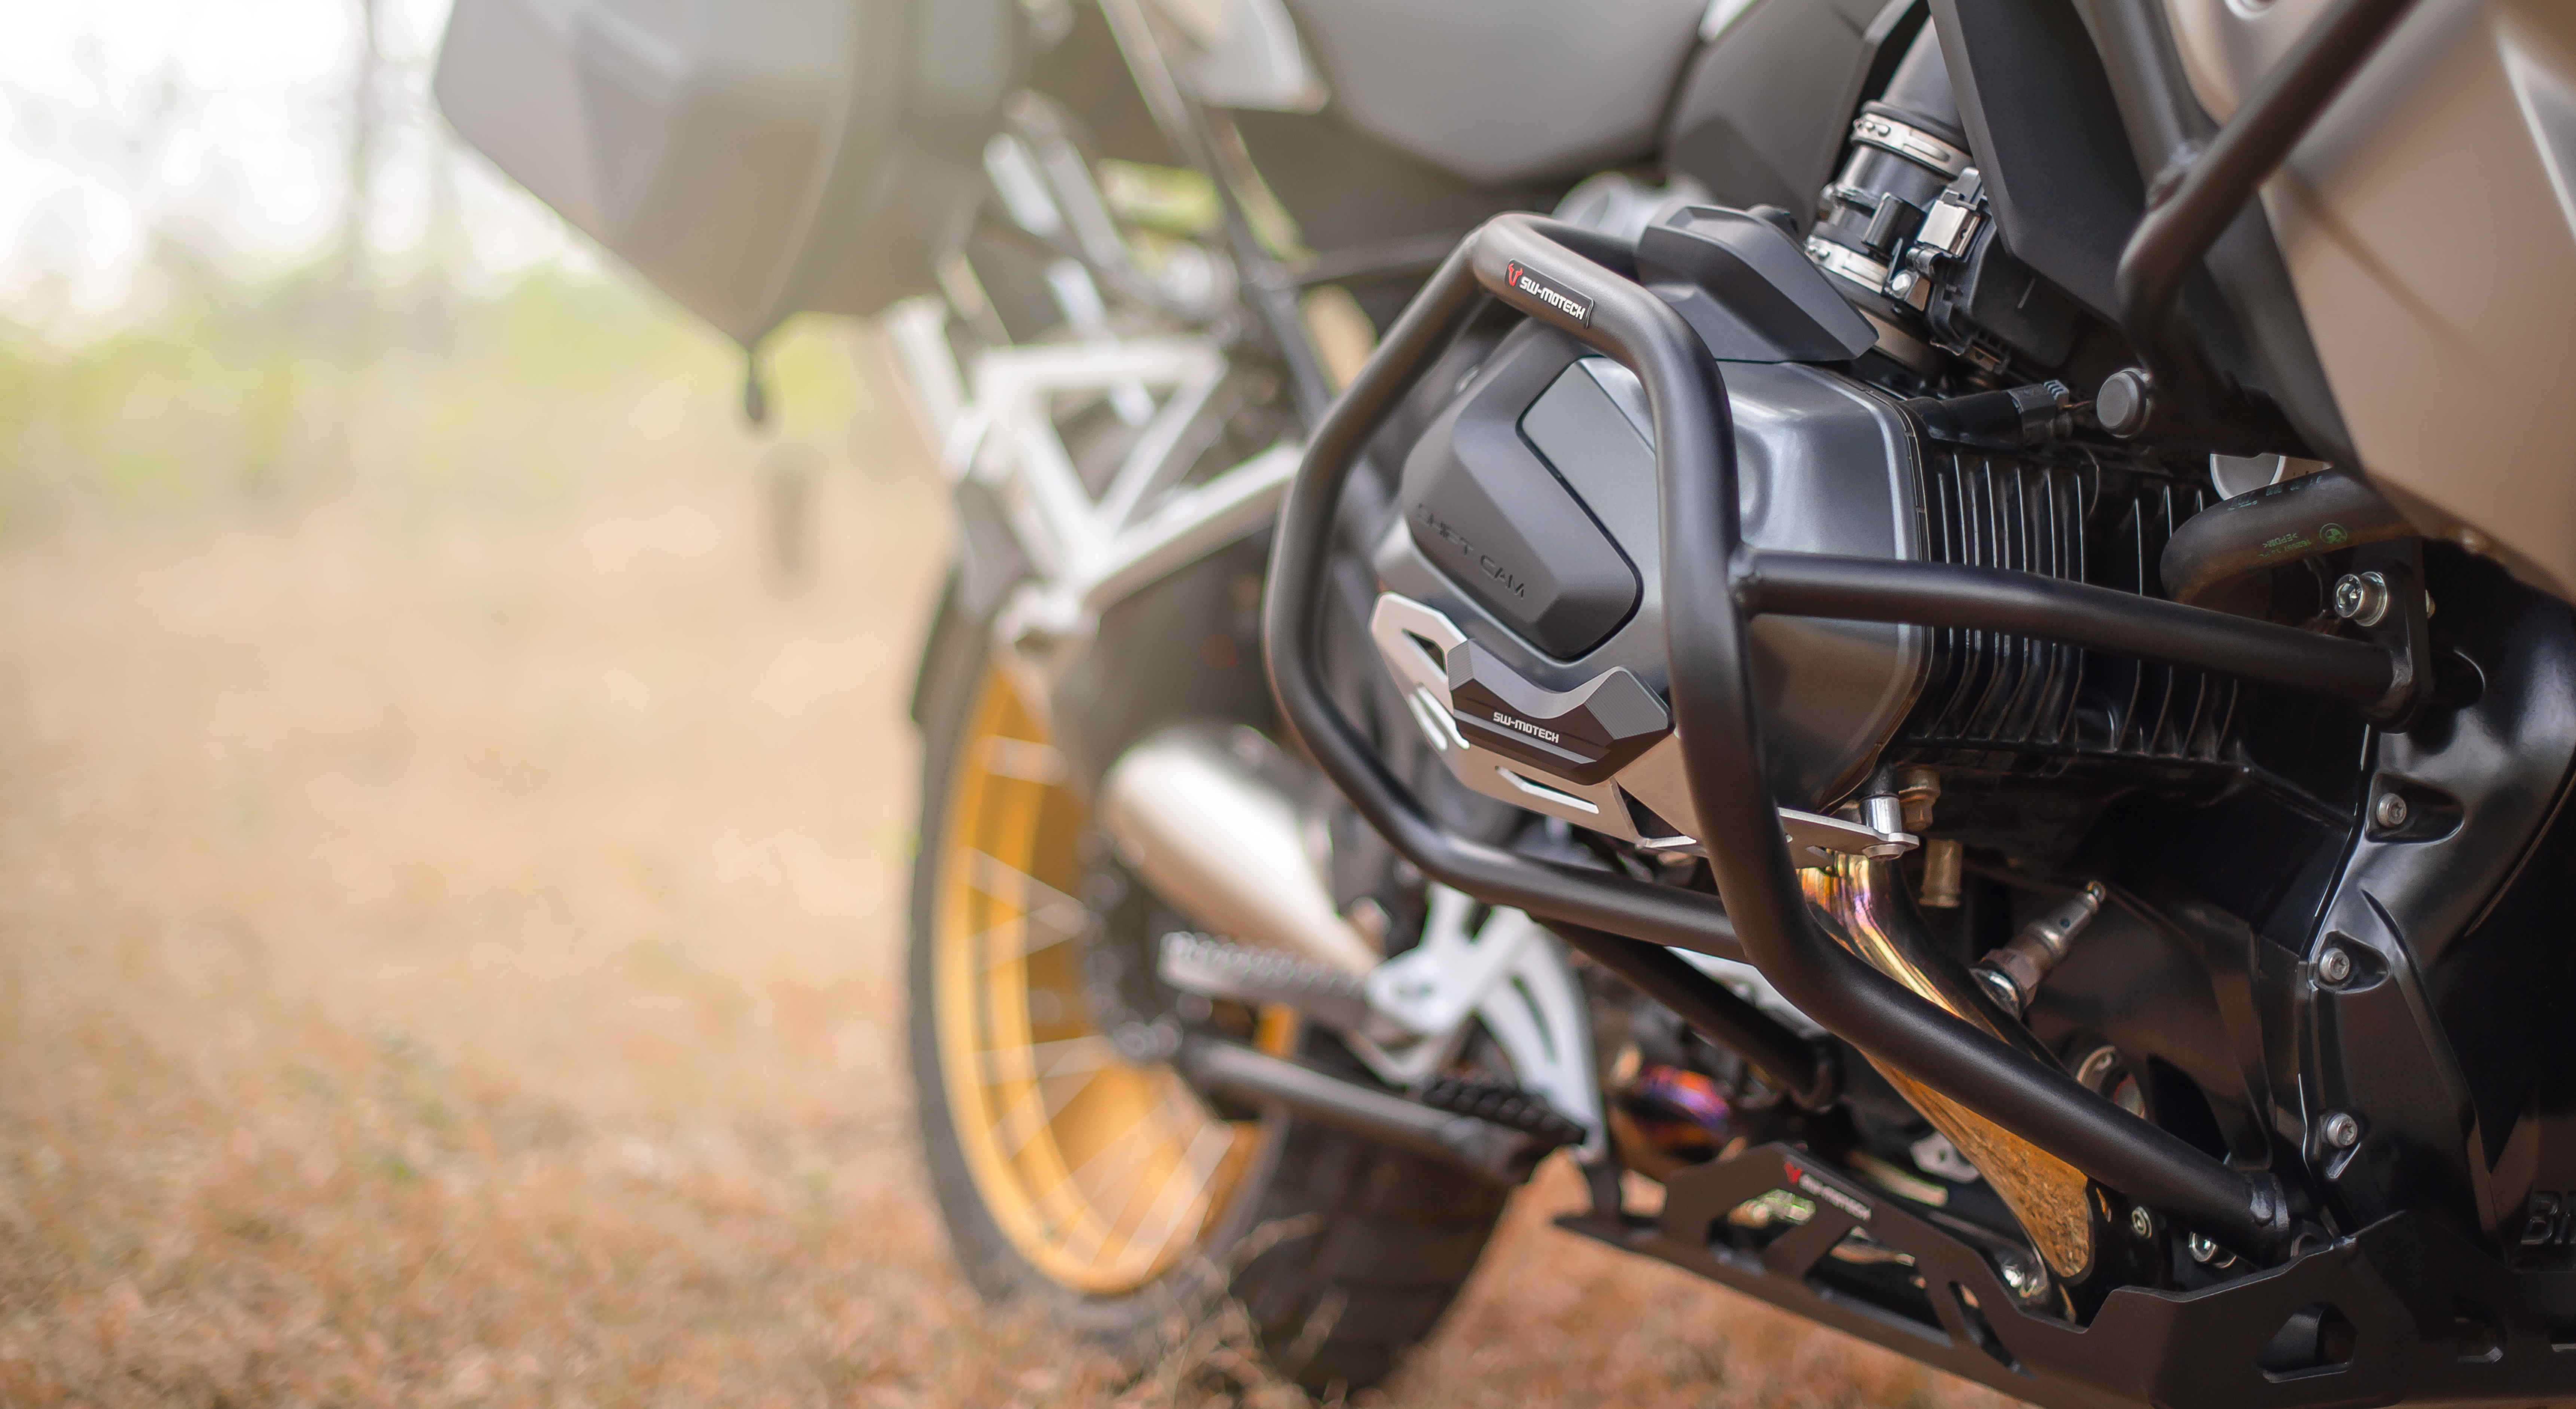
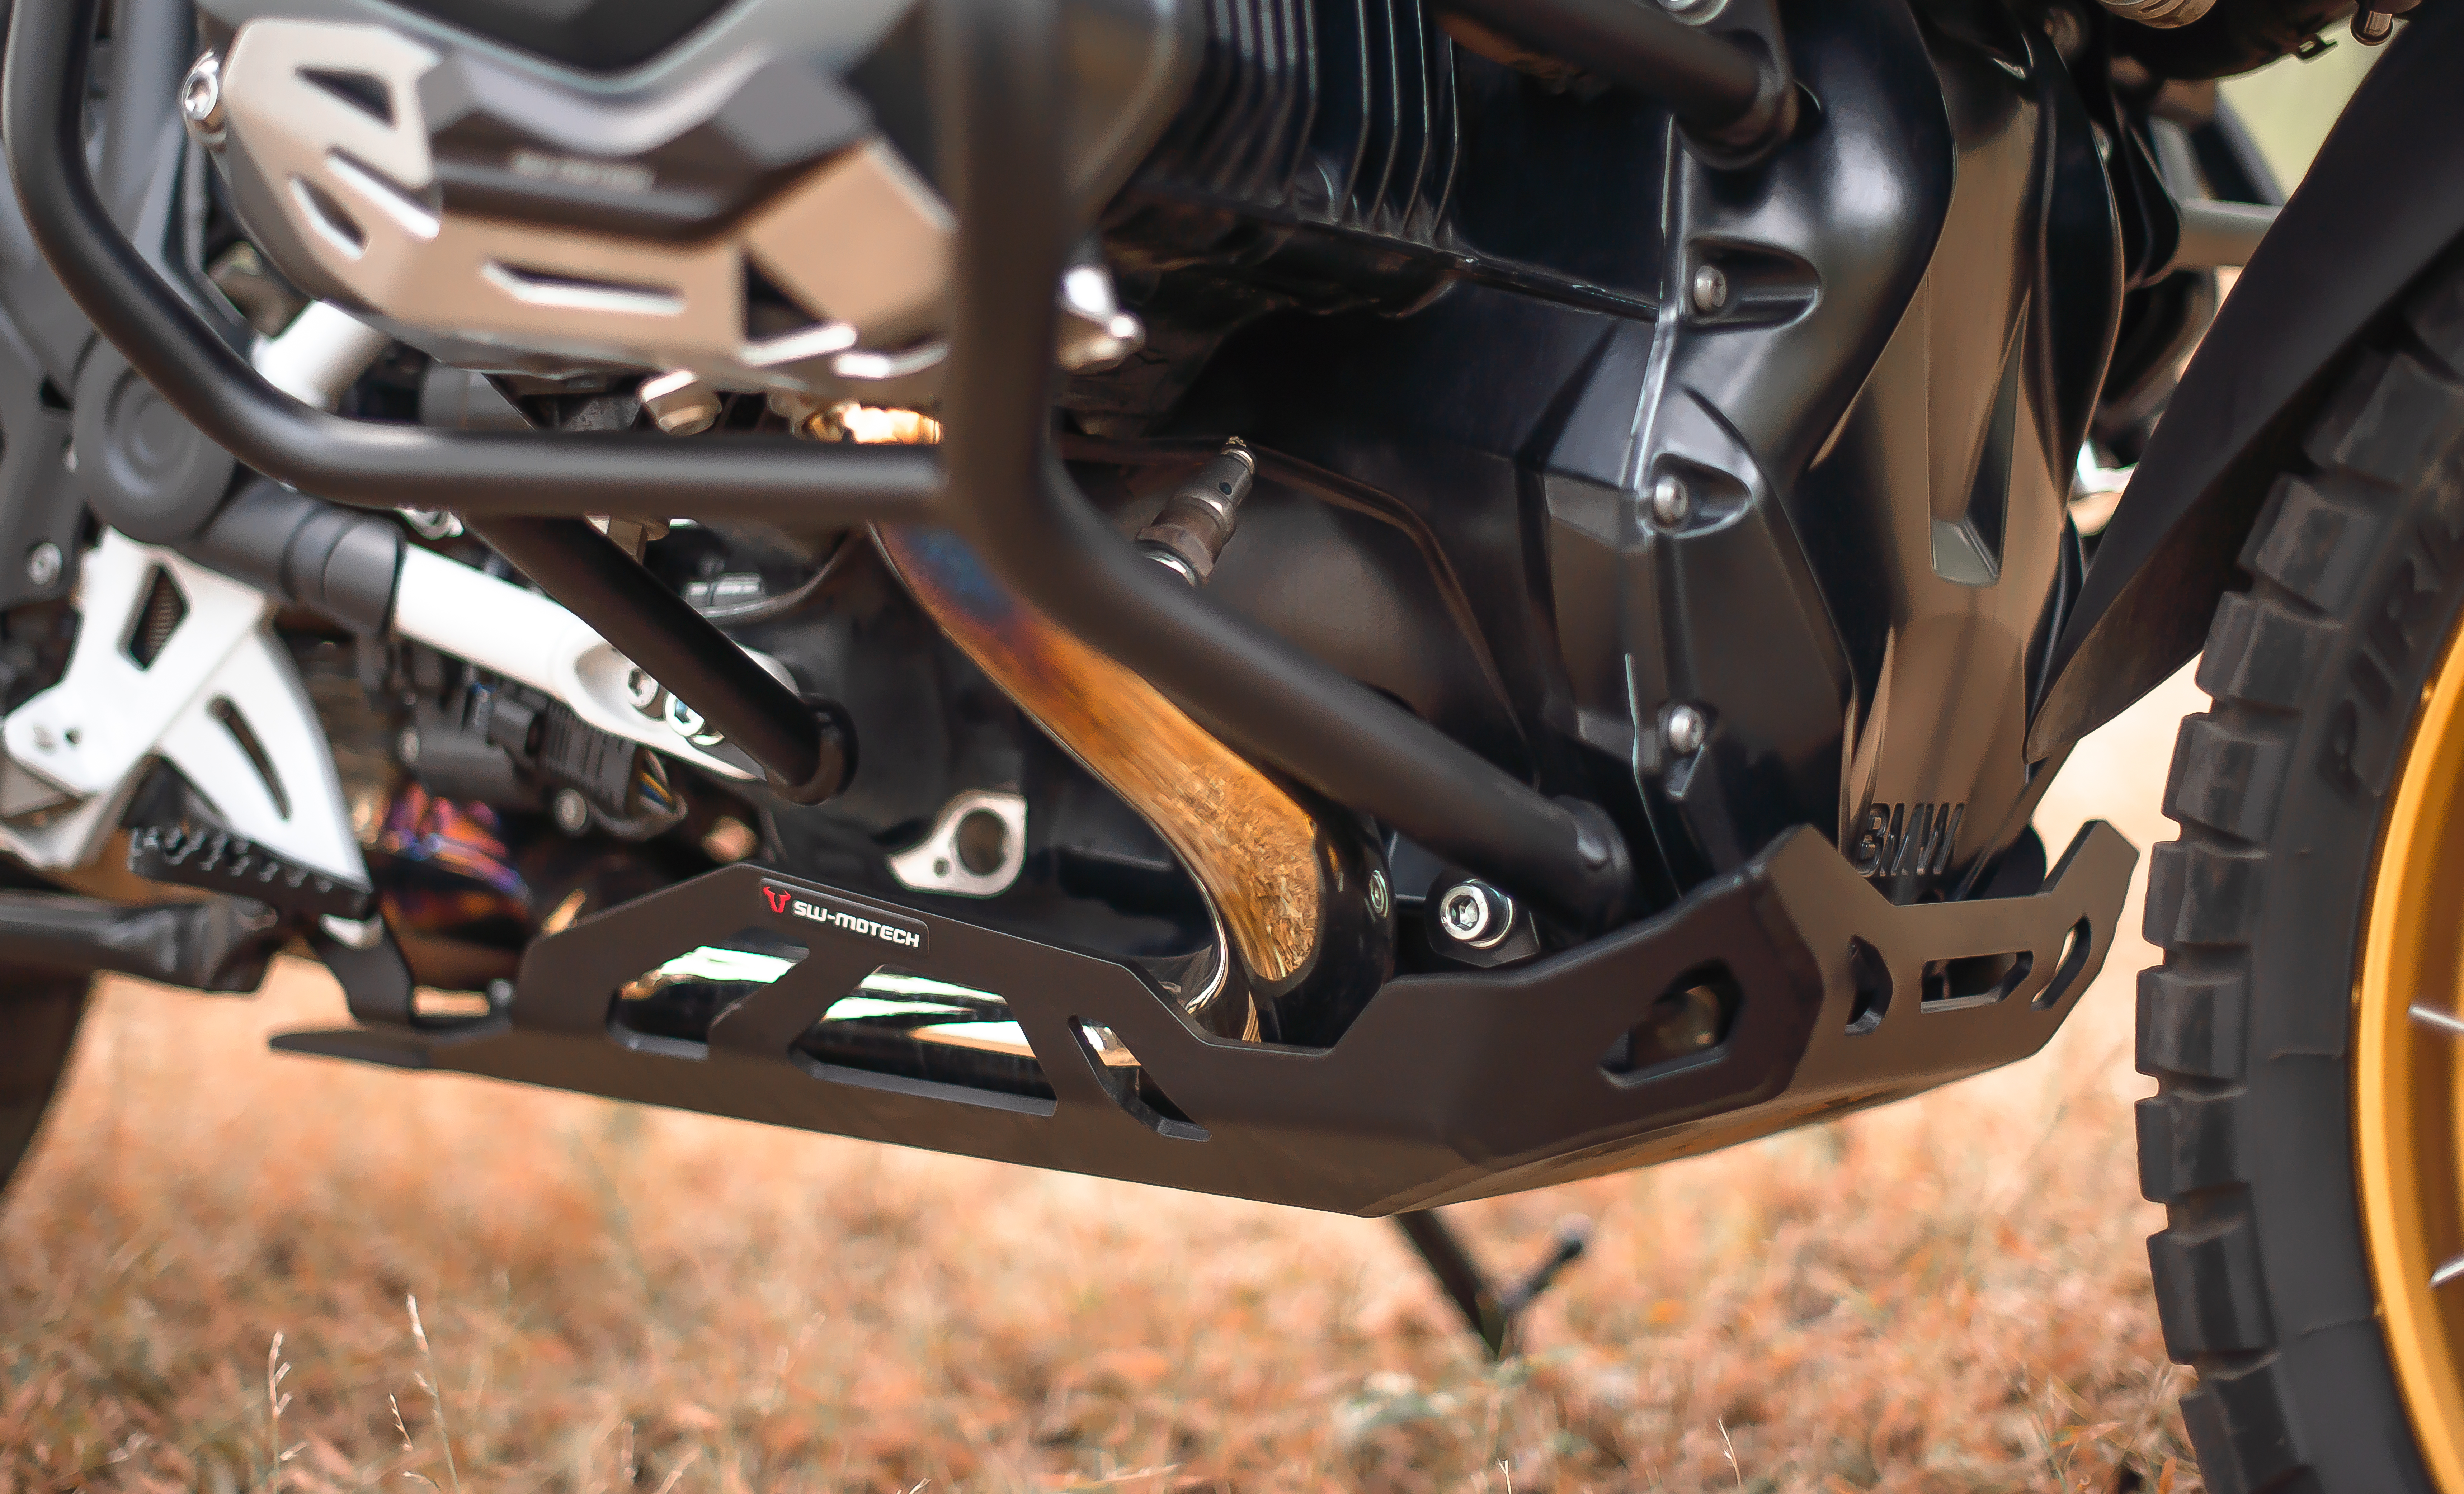
Lower Crash Bars, Sump Guard, Windscreen Reinforcements, Axle Sliders & Side Stand Enlarger.
(Click on an image to see it up close)
Along the way, the brake cylinder and reservoir guards were also bolted on in quick succession. Fairly easy stuff.
Then came the gear shift lever from SW-Motech, which required rider input from Nipun Srivastava, who came in all decked up with his new KLIM gear, ready to show off for the cameras! (Watch the video at the bottom to check it out!)
Lunch for the team was a quick ‘Vada Pav’, which is basically an Indian veggie burger with a potato patty – our go-to snack during builds like these and while on rides.

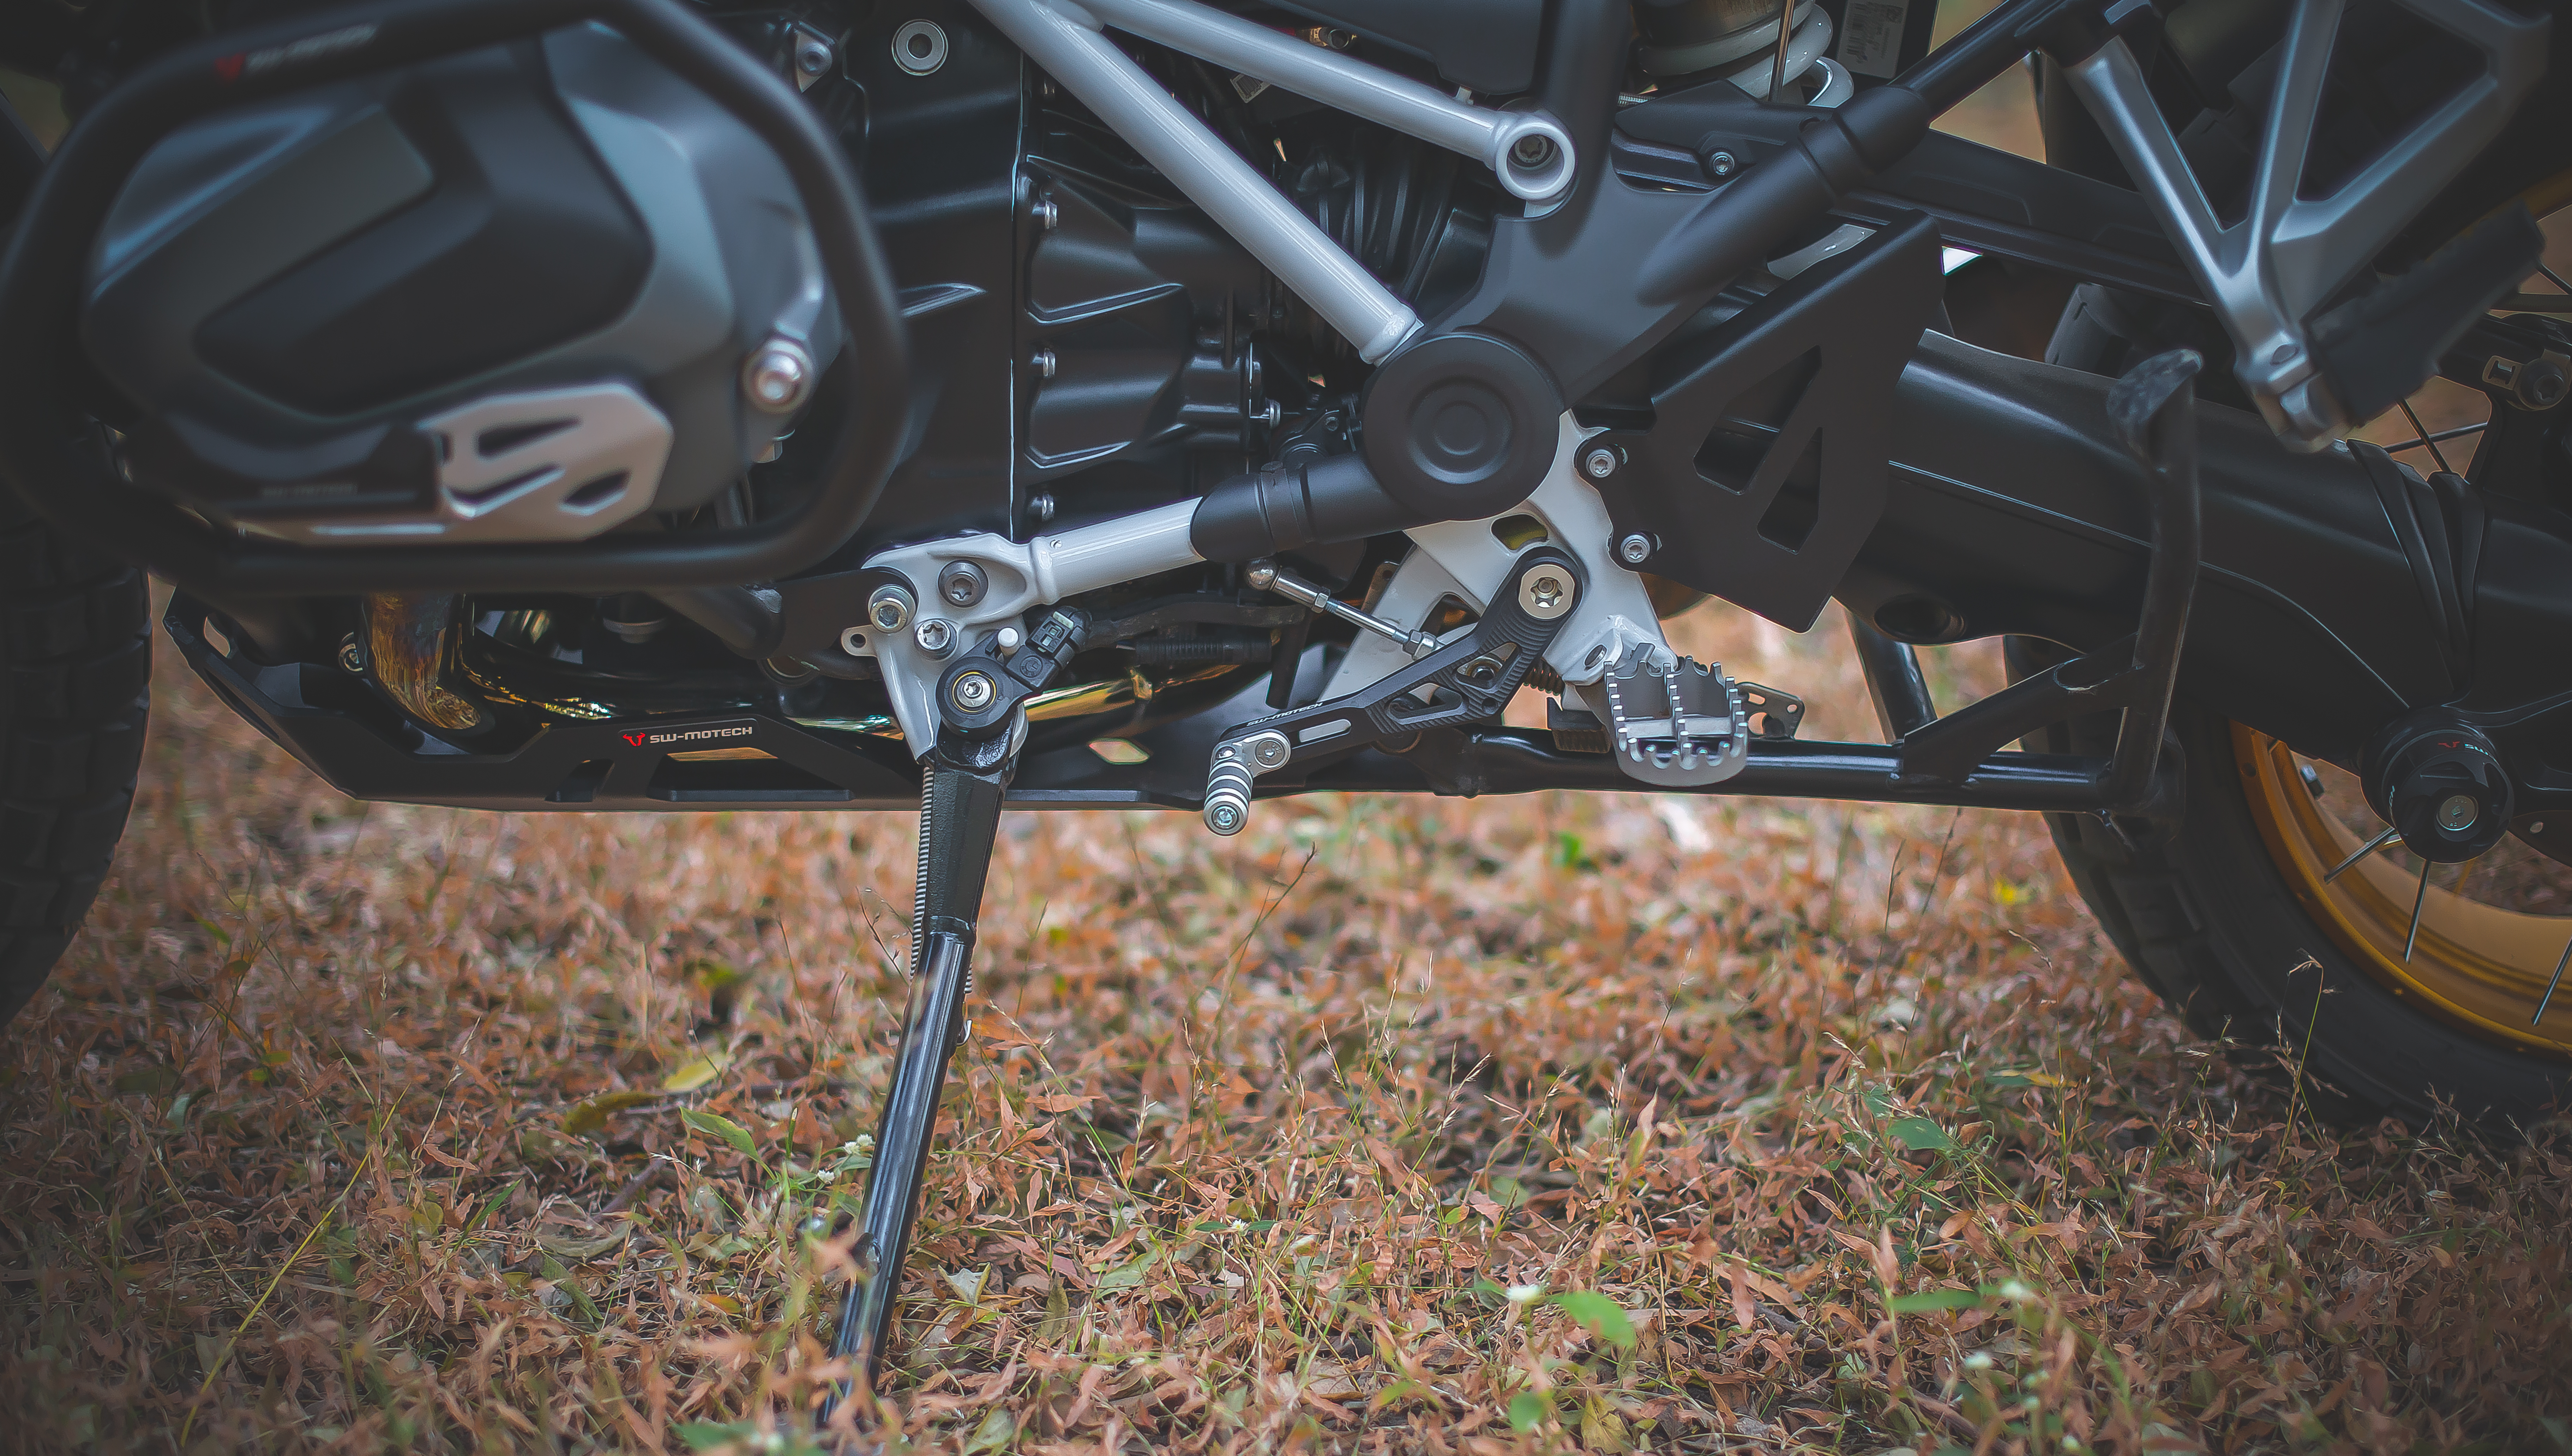

Brake Reservoir Guard, Gear Shift Lever & Brake Cylinder Guard.
After lunch, as the lights came on again and the cameras fired up, came the job of figuring out how to mount the dutiful Denali D4 LED lights. The directions in the box are a boon but the lights were to go on in unison with the DataDim Module from Denali and also the Denali Light Mount for the R1250GS, which was to replace the crossmember on the upper crash bars from SW-Motech (phew! Just saying it out loud is a feat!), the 3-position-switch was also to be connected as we were not using the Can-Smart Controller. Not to forget the routing of wires all the way under the fuel tank cowl, making its way to the under-seat battery.
This part of the installation took time as so many bits were involved, however it was a fairly straightforward process, with a little back and forth on the routing of wires and ideal placement of the D4 light pods. We would also add a couple of S4 light pods with the help of ‘splitters’ (also provided by Denali) a few days later, so the time the boys took painstakingly snaking the wiring through, helped us bolt the S4s on in a jiffy!
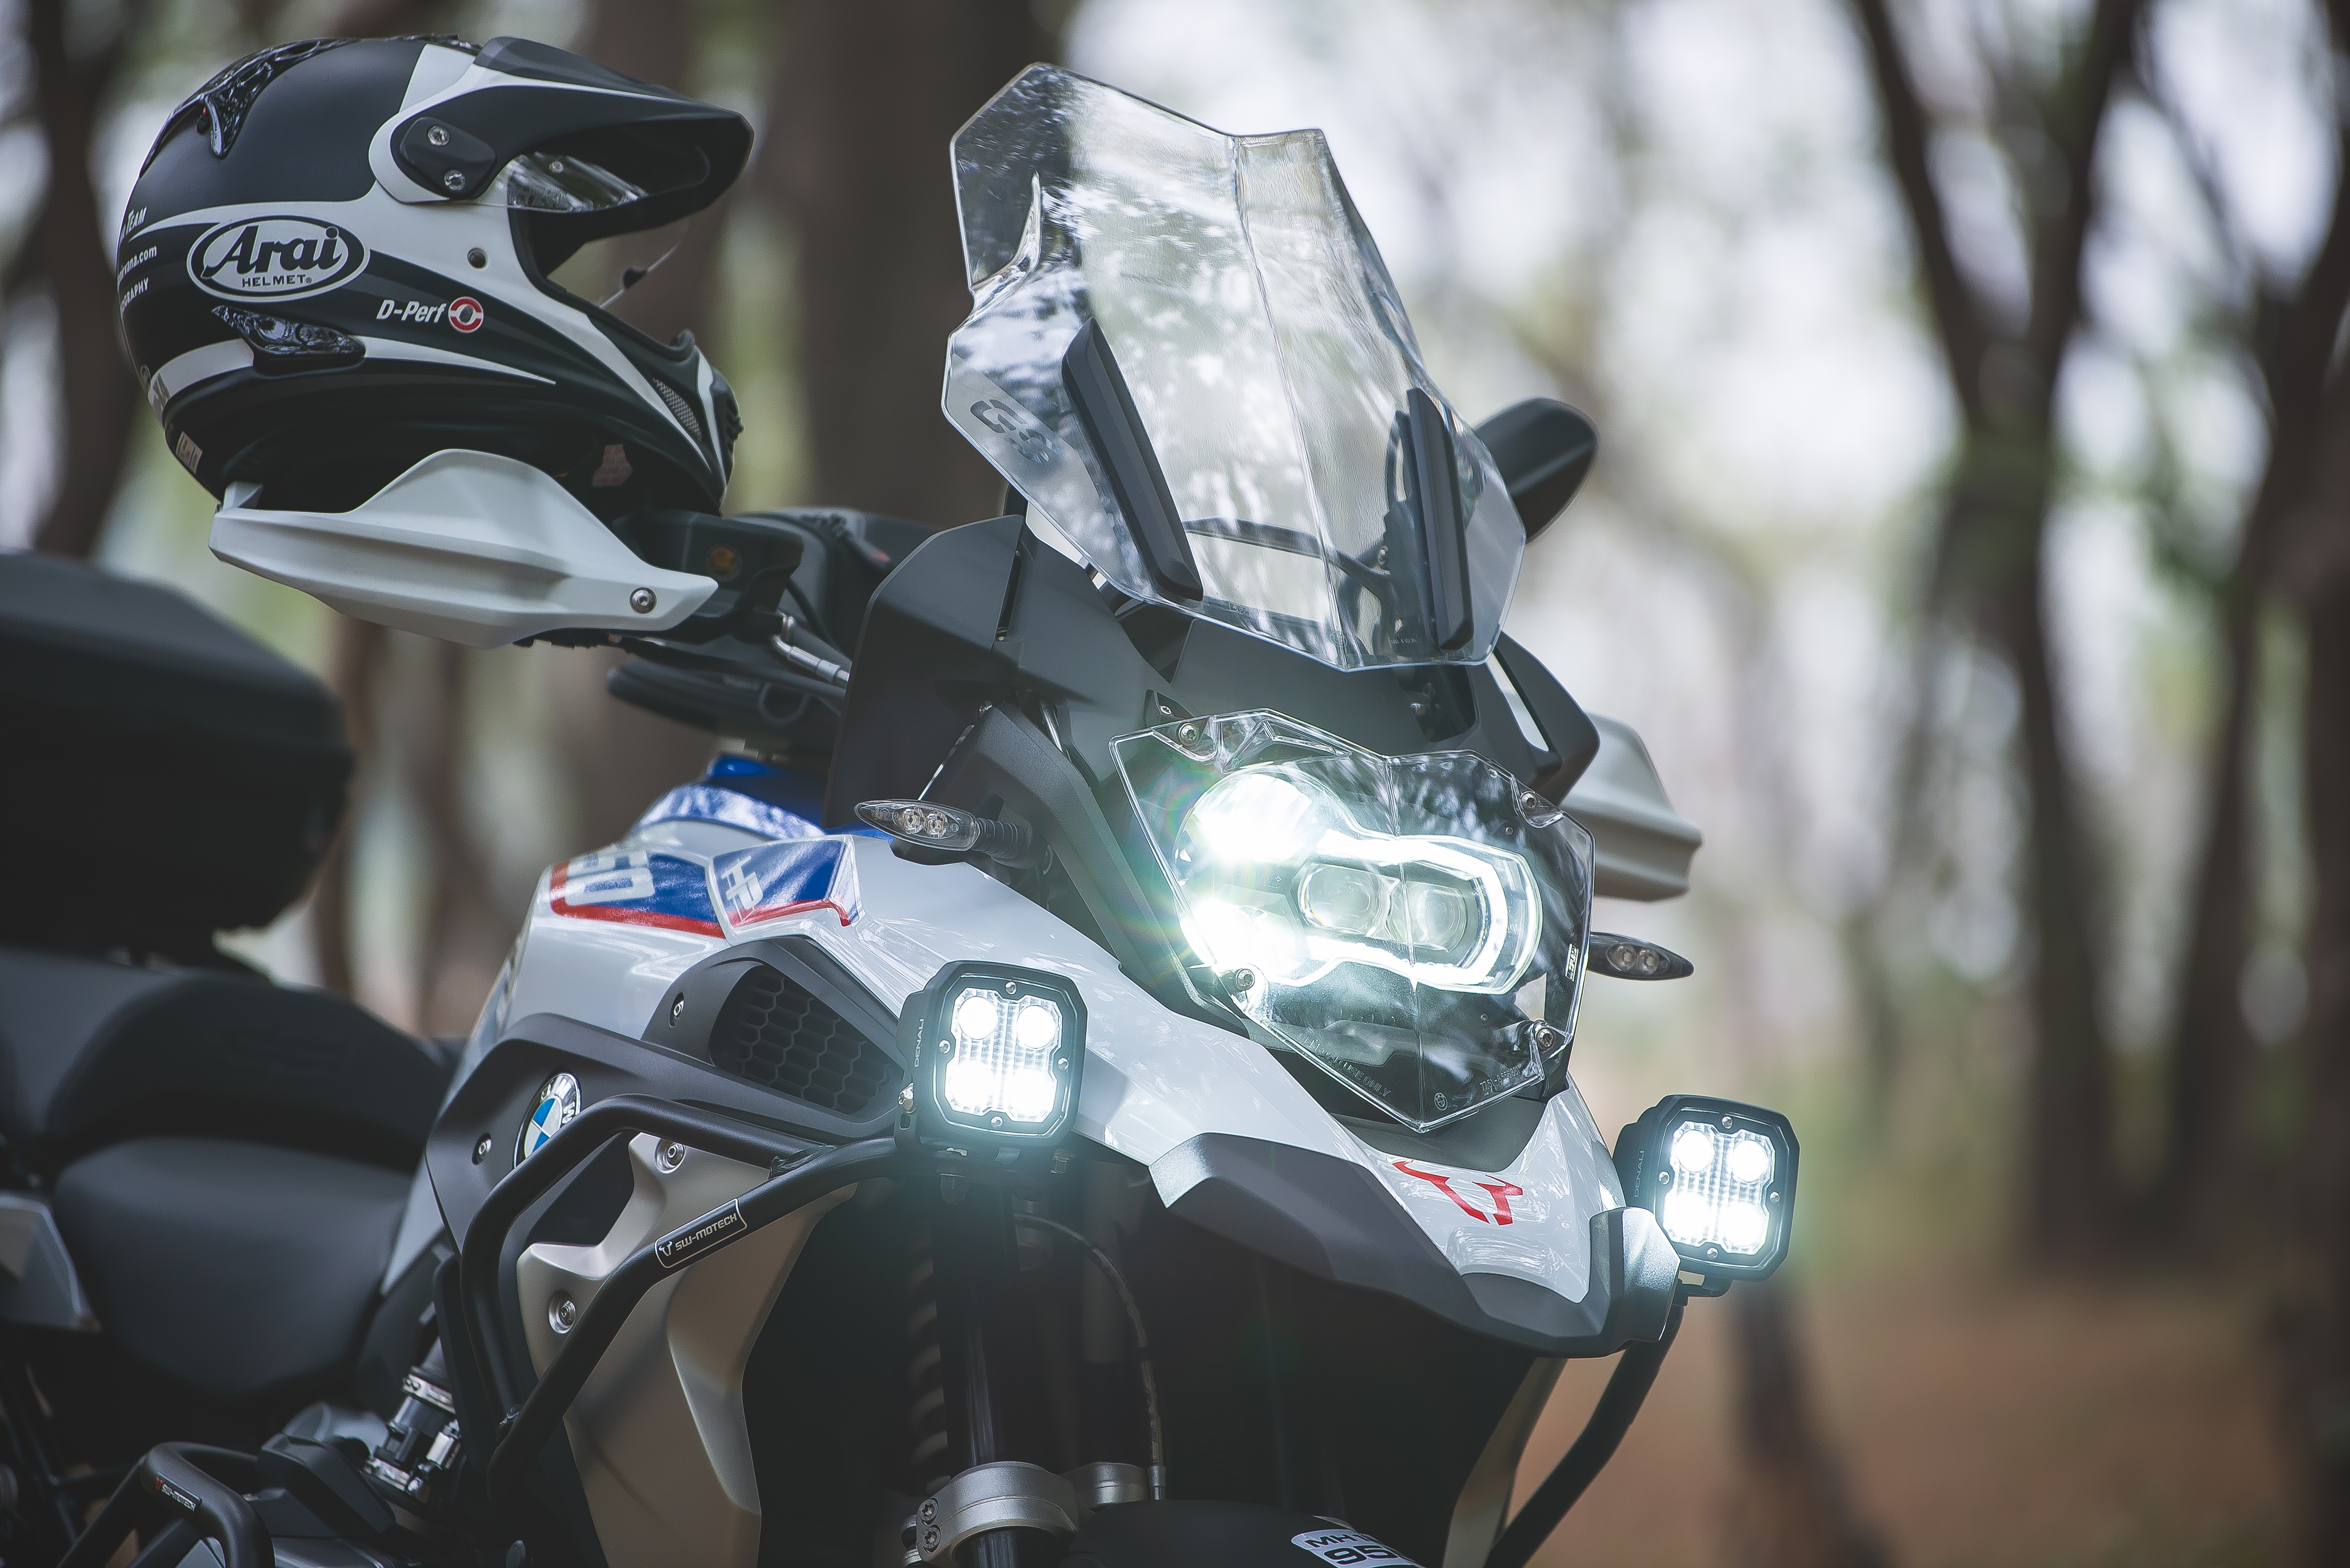


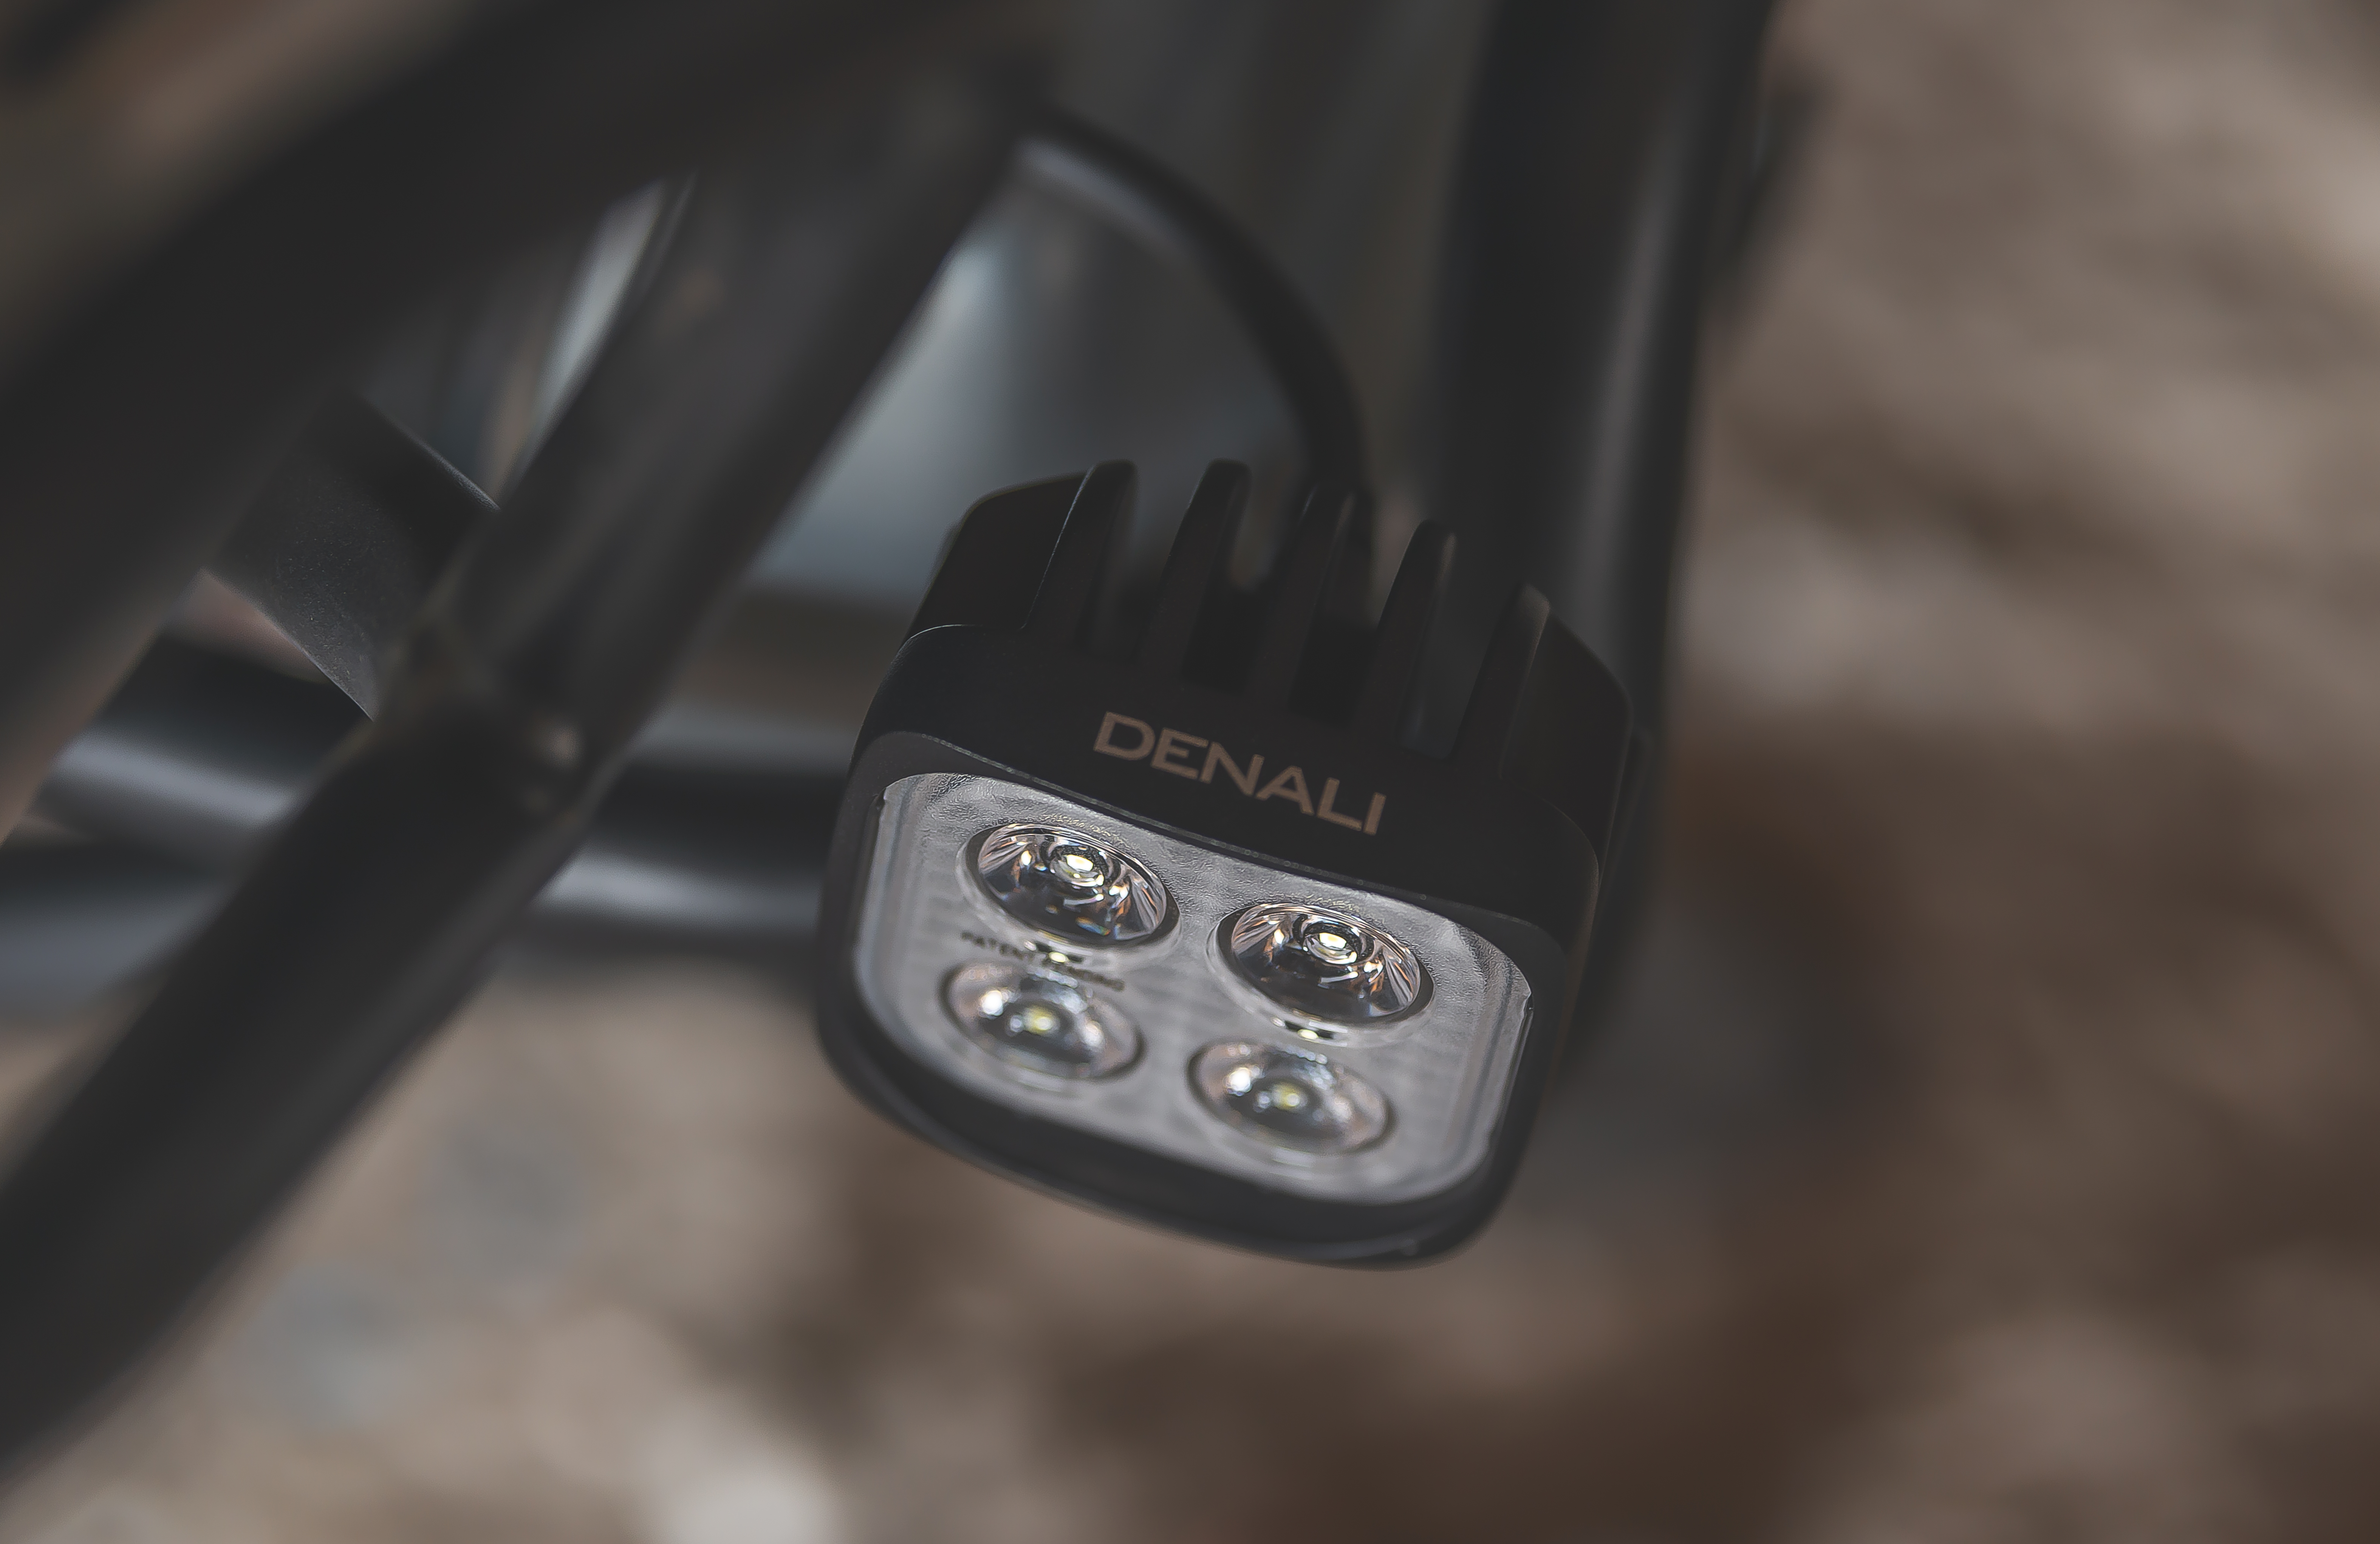

Denali D4 V2 TriOptics all lit up with the new Denali S4s in tandem.
Finally then, as the Sun went under, came the luggage systems. Nipun had chosen the stunning new Aero ABS semi rigid panniers for his steed, an unconventional choice for the GS, but he swears by them as he’d been using the earlier version of the same boxes for years on his Kawasaki Versys 650, check out the Kwacker here: Sport Tourer for the Soul.
The Aero ABS panniers mount onto the new PRO Side Carriers from SW-Motech, even with the boxes off the bike, the PRO carriers look quite smart, giving the motorcycle a real rugged look.

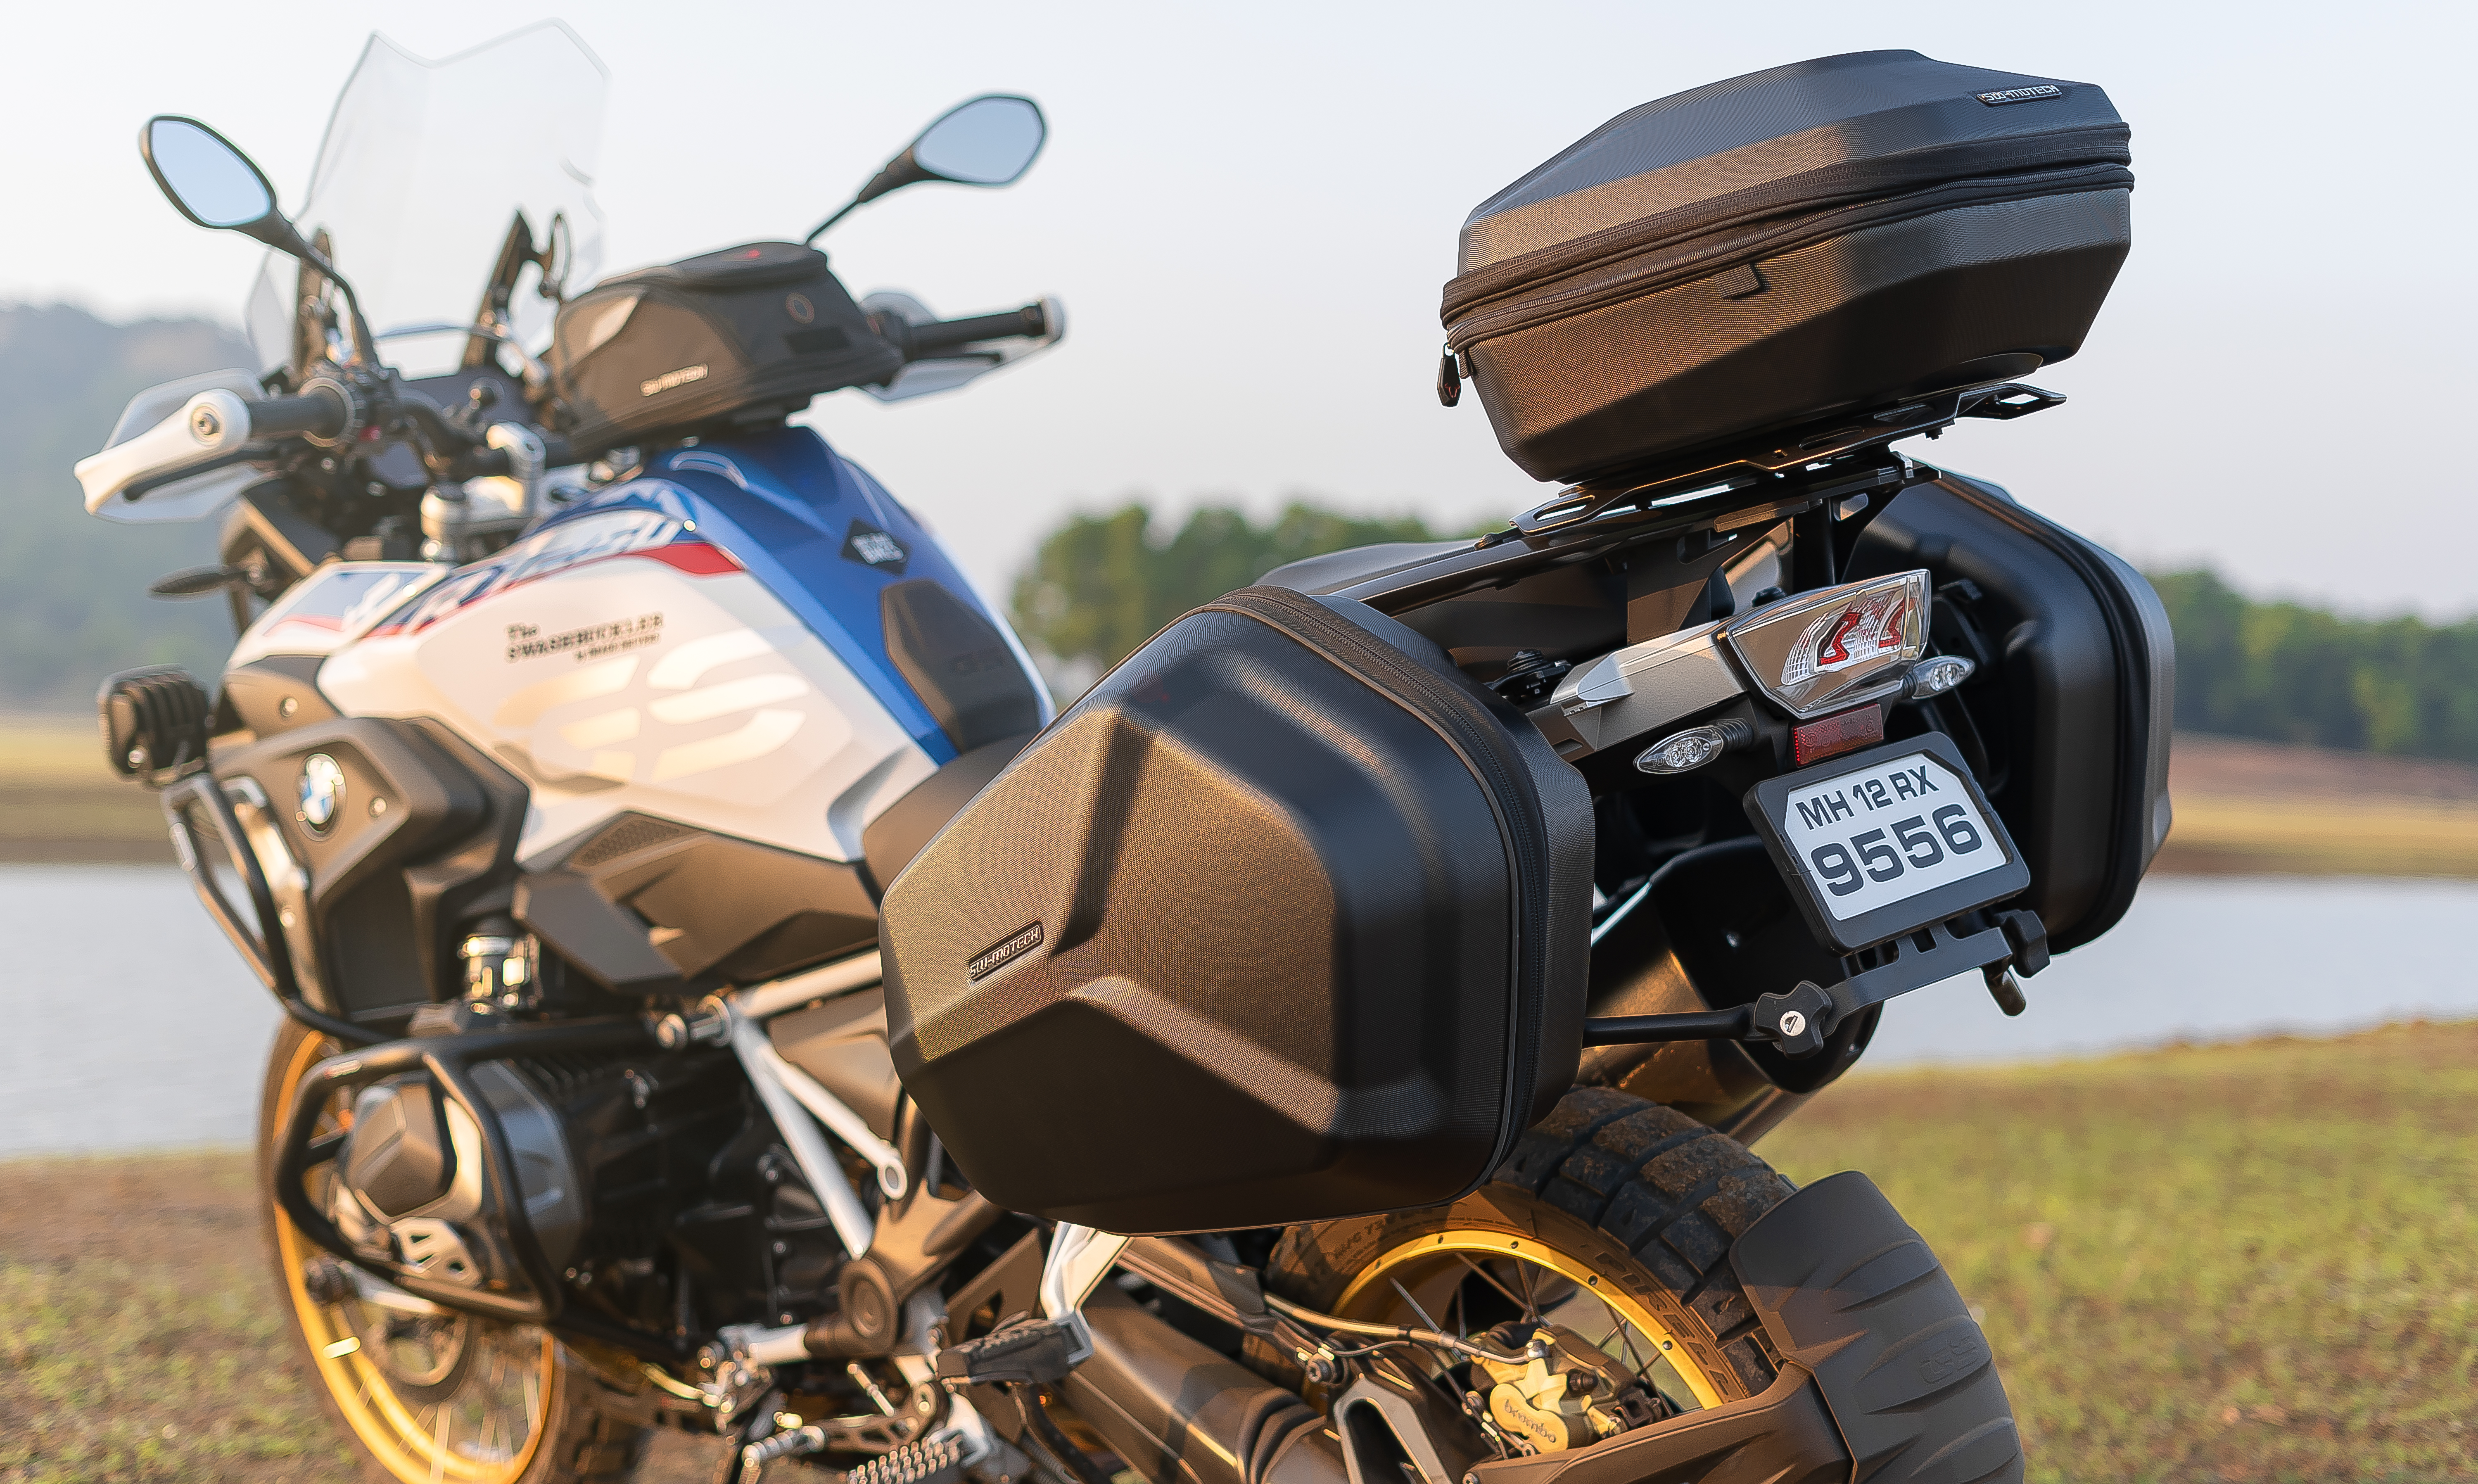
The stunning Aero ABS Side-Pannier System from SW-Motech!
After the panniers, the Adventure Rack went on, with the adapter plate for the Urban ABS TopCase. This took surprisingly long as we found ourselves completely flummoxed by the adapter plate and its mountings atop the Adventure rack. Looking back, it was probably the non-stop 15 hours of standing and continuous working on the motorcycle that had taken its toll on the team, we stopped. We pulled out all product literature and read through the mounting sequence line by line. Our lead technician finally figured it out as the clock struck 11pm (remember, we started this gig at 6am).
And then the Top Case went on as easy as butter melting on toast. Check it out below!


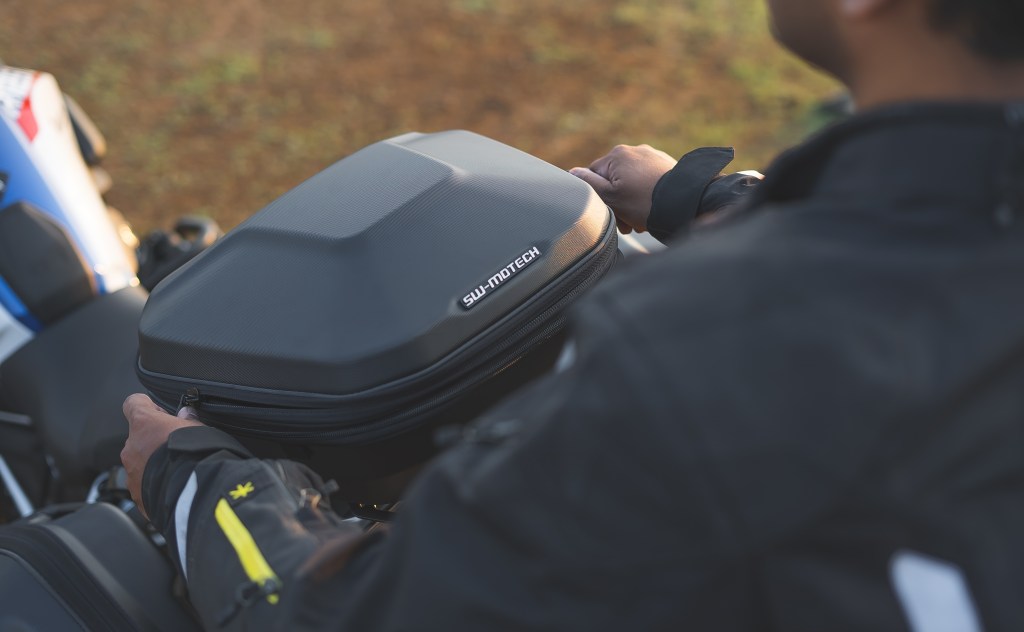
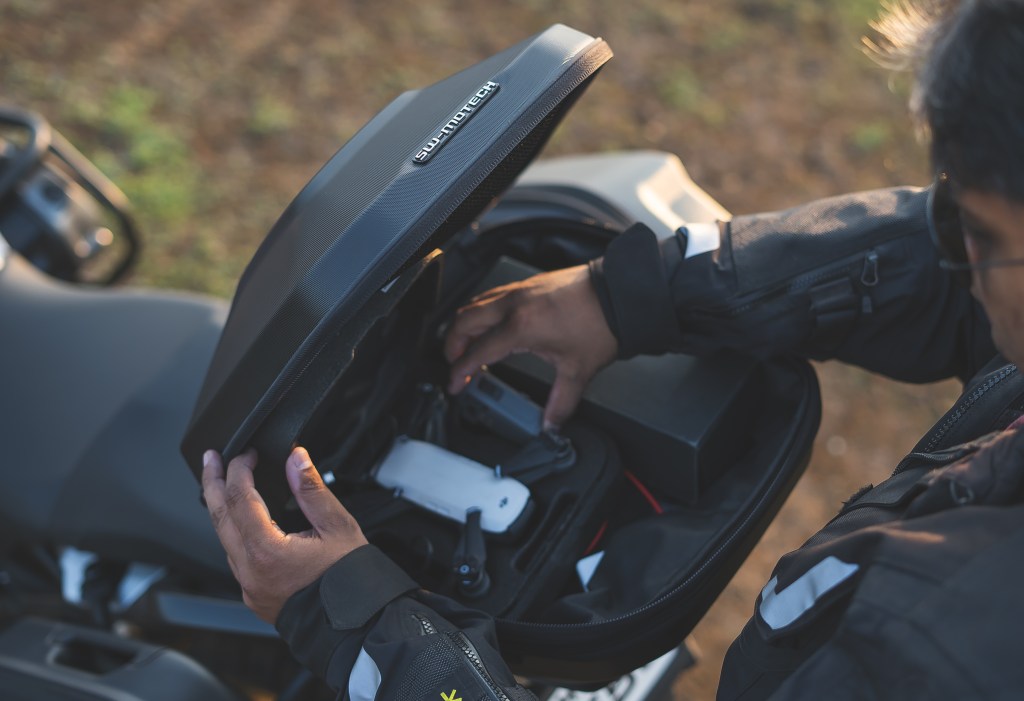
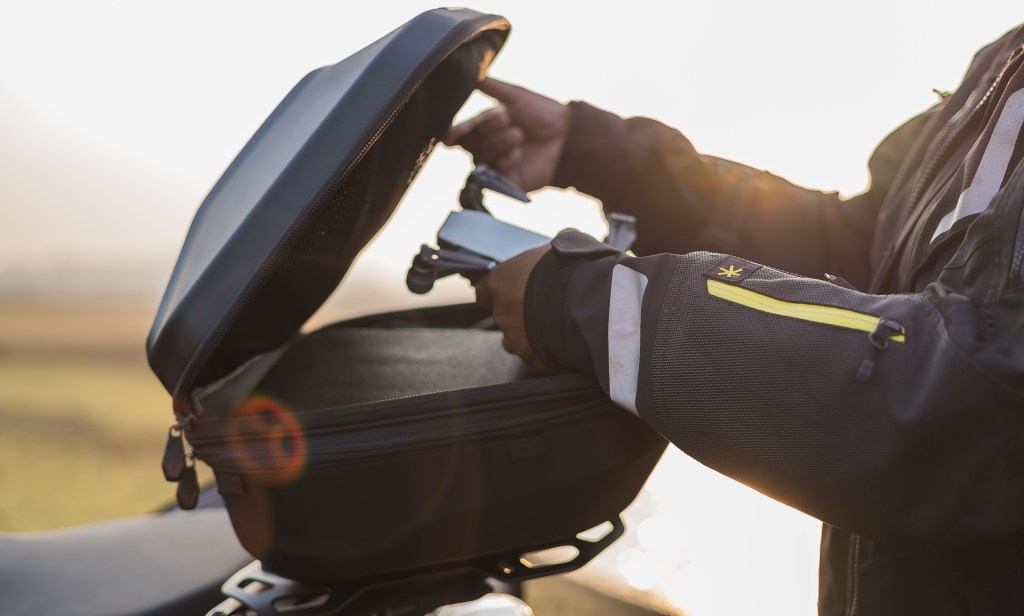

The Adventure Rack & Urban ABS Top Case in action.
Finally, our list was complete and we rechecked every part installed on the motorcycle one last time and that was it.
PRO TIP: If, ever, like us, you are crazy enough to attempt installing so many parts on a GS all at once, take it from us, install the Tank Bag and Tank Ring absolutely at the end. We spent a lot of time installing the tank ring and then repeatedly taking it off to access the space under the fuel tank cowl.
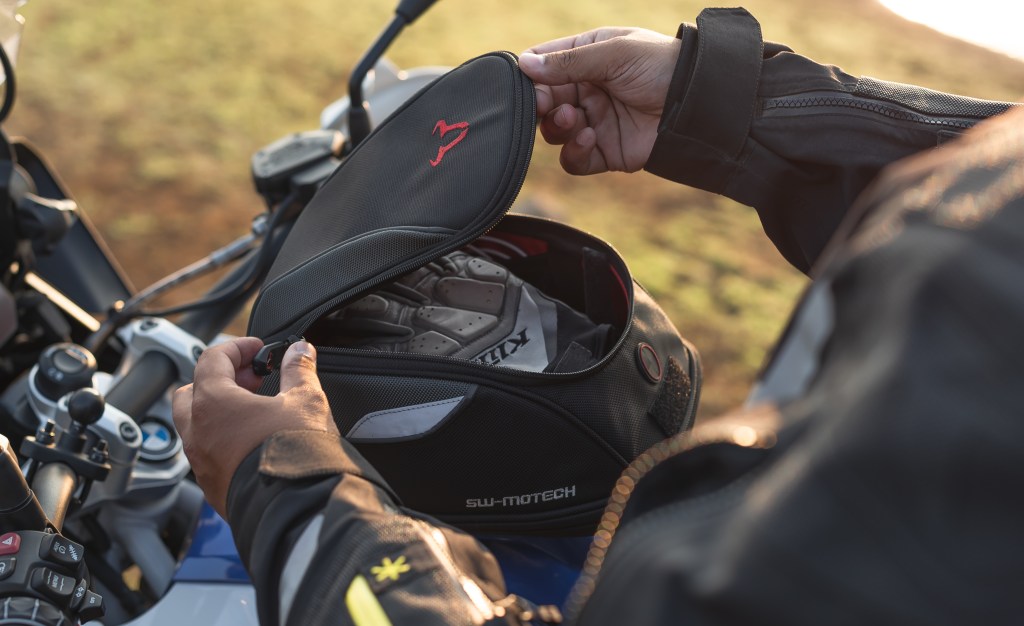


The Daypack Tank Bag from SW-Motech.
Trust us, it sounds way less intense than it really was. Multiple takes and retakes for the video crew, actually trying to figure out how to mount the parts without losing any bits and bobs in the process. Bagging and tagging each bit to come off the stock bike, behind the scenes – it had all been a true marathon. But we delivered on our promise and Nipun got to ride his steed home that night, fully loaded.
Wondering how it all turned out?
Check out the short video below to catch the full reveal and see how @thenirvanateam went about their job.
Over 20 hours of painstaking work, showcased in just 4 minutes, enjoy!
CHECK OUT THE FULL ACCESSORIES SHOWCASE!
Do share this post with your buddies and feel free to comment and join the conversation!

Motorcycle built by The Nirvana Team. Accessories provided by SW-MOTECH & DENALI Electronics. Project supported by BIG BAD BIKES.

Tell us what you think!